A couple of years blog I created a post containing how to create VLANs on Ubiquiti's UniFi controller. Since then the UI has changed somewhat. But perhaps most interestingly, I lost ALL of my configuration at the beginning of this year. Which means that I have to go and re-create my VLANs. Unfortunately life has got in the way (new job, new addition to the family), but I thought unless I just get on with it I might never get around to it. So here it is!
Recap
This effort started when I was working for a previous organisation, and there were alerts fired against my company laptop, but for IP addresses for systems that were not my laptop. It turns out that the security agent on my laptop was scanning my entire network! It's also a good idea to segment your network into logical segments to help from a security perspective.
Step 1
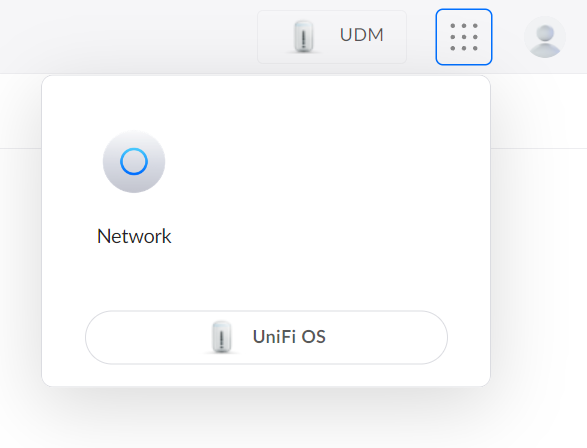
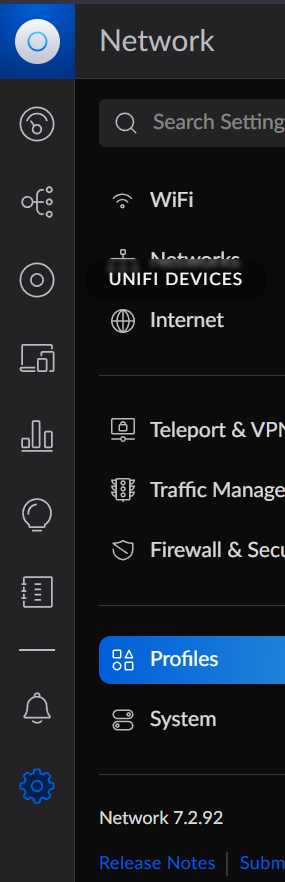
The first step is to log into your UniFi controller, and go to the Network section. You can do this by clicking on the dot matrix at the top right of the page:
Step 2 - Network
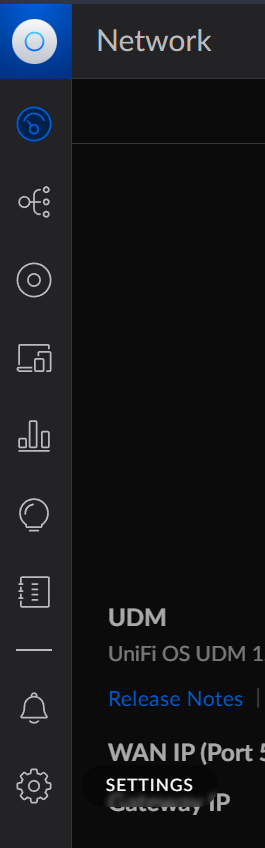
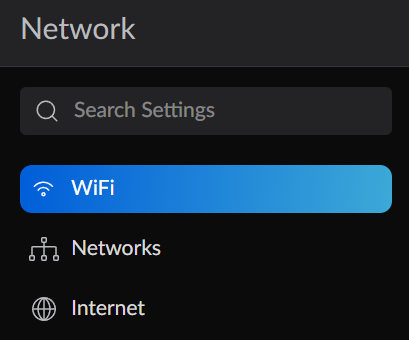
The next step is to go to your Settings section. This is the cog icon on the left hand pane:
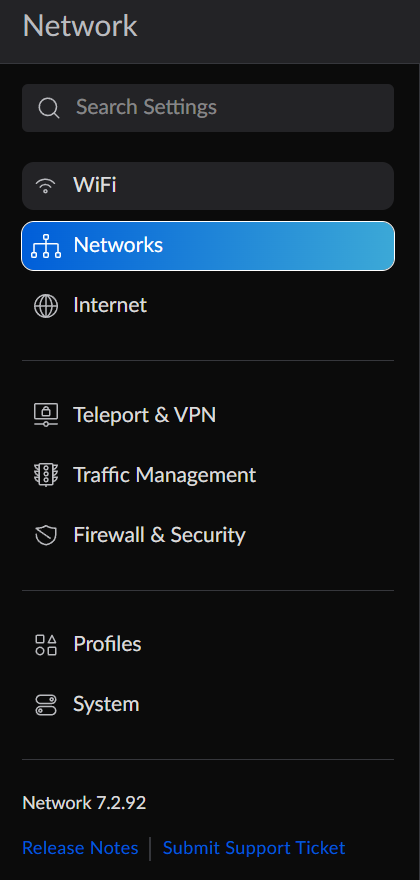
From there select the Networks option:
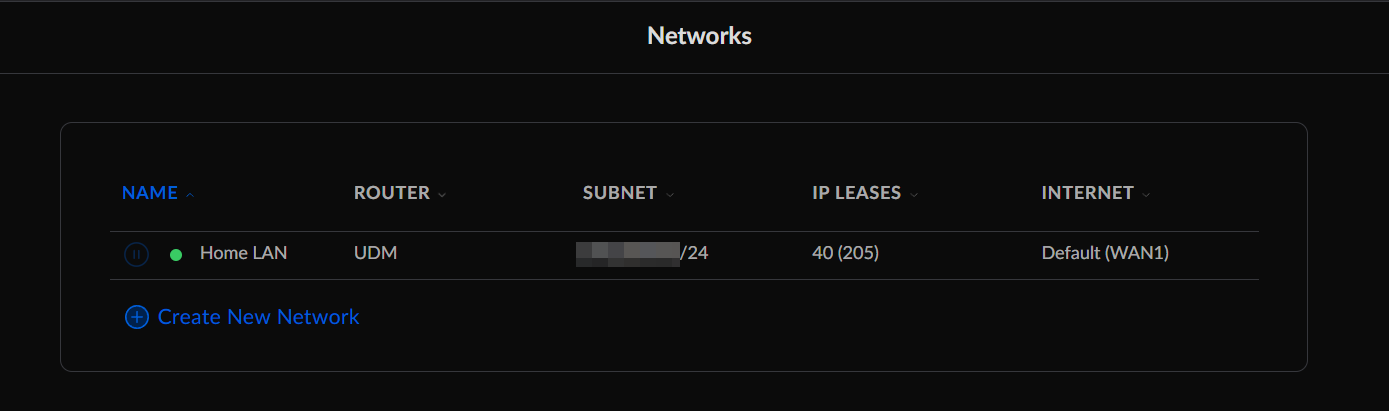
Click on the Create New Network link to create a new network:
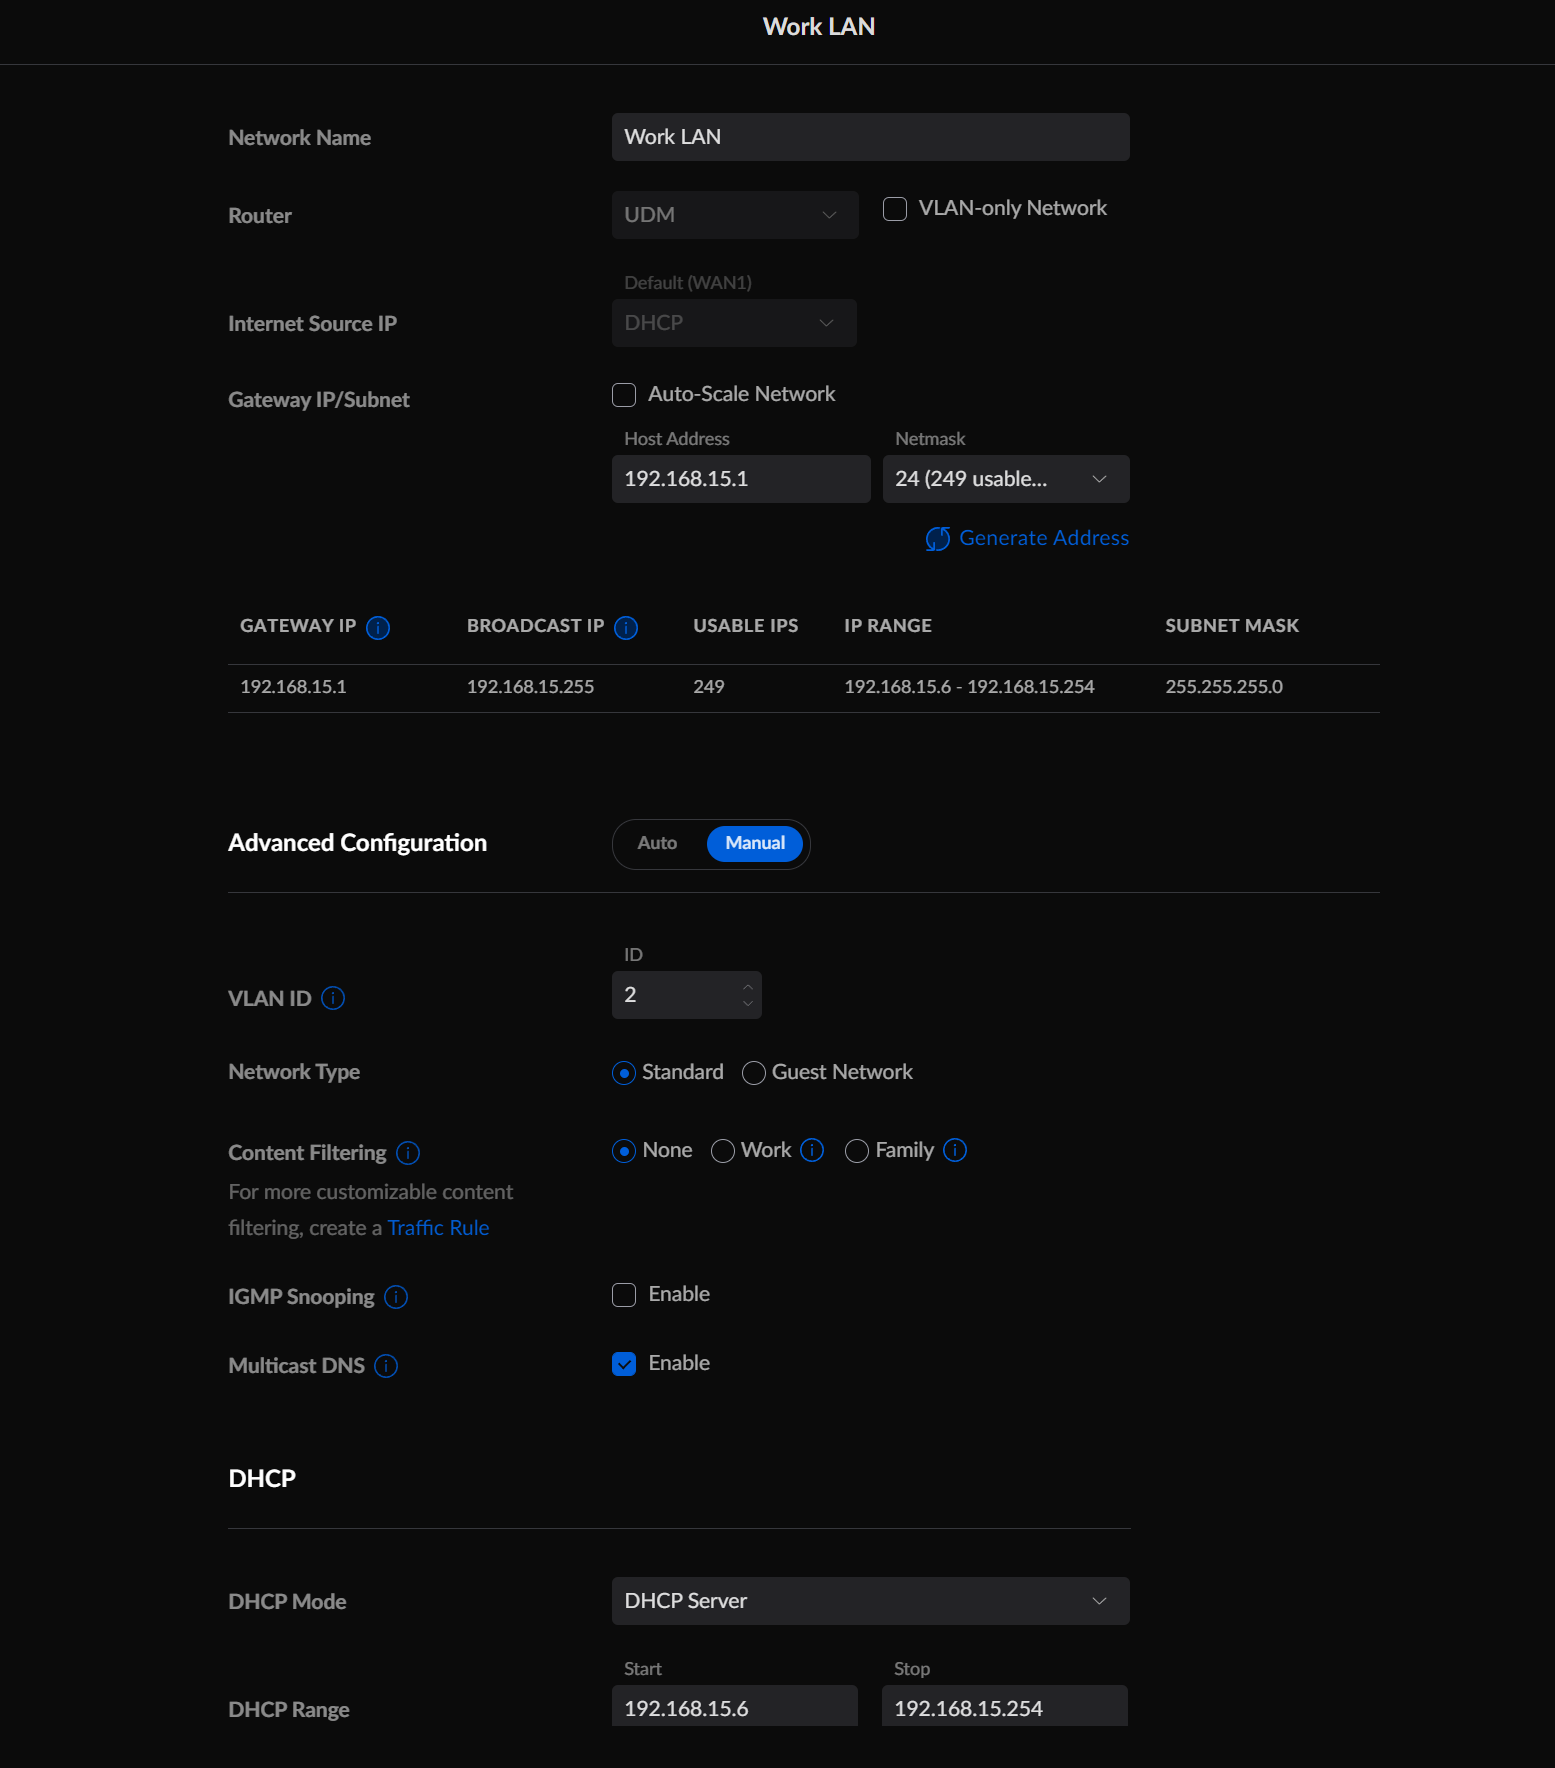
Next enter or select the following fields:
- Network Name - give an appropriate name for your network
- Gateway IP/Subnet - this is the subnet range that you will give the network, so either leave it as is, or uncheck Auto-Scale Network and enter your desired subnet range is the Host Address and Netmask fields.
- Advanced Configuration - select Manual (or leave as Auto if you don't want to configure things such as DNS servers)
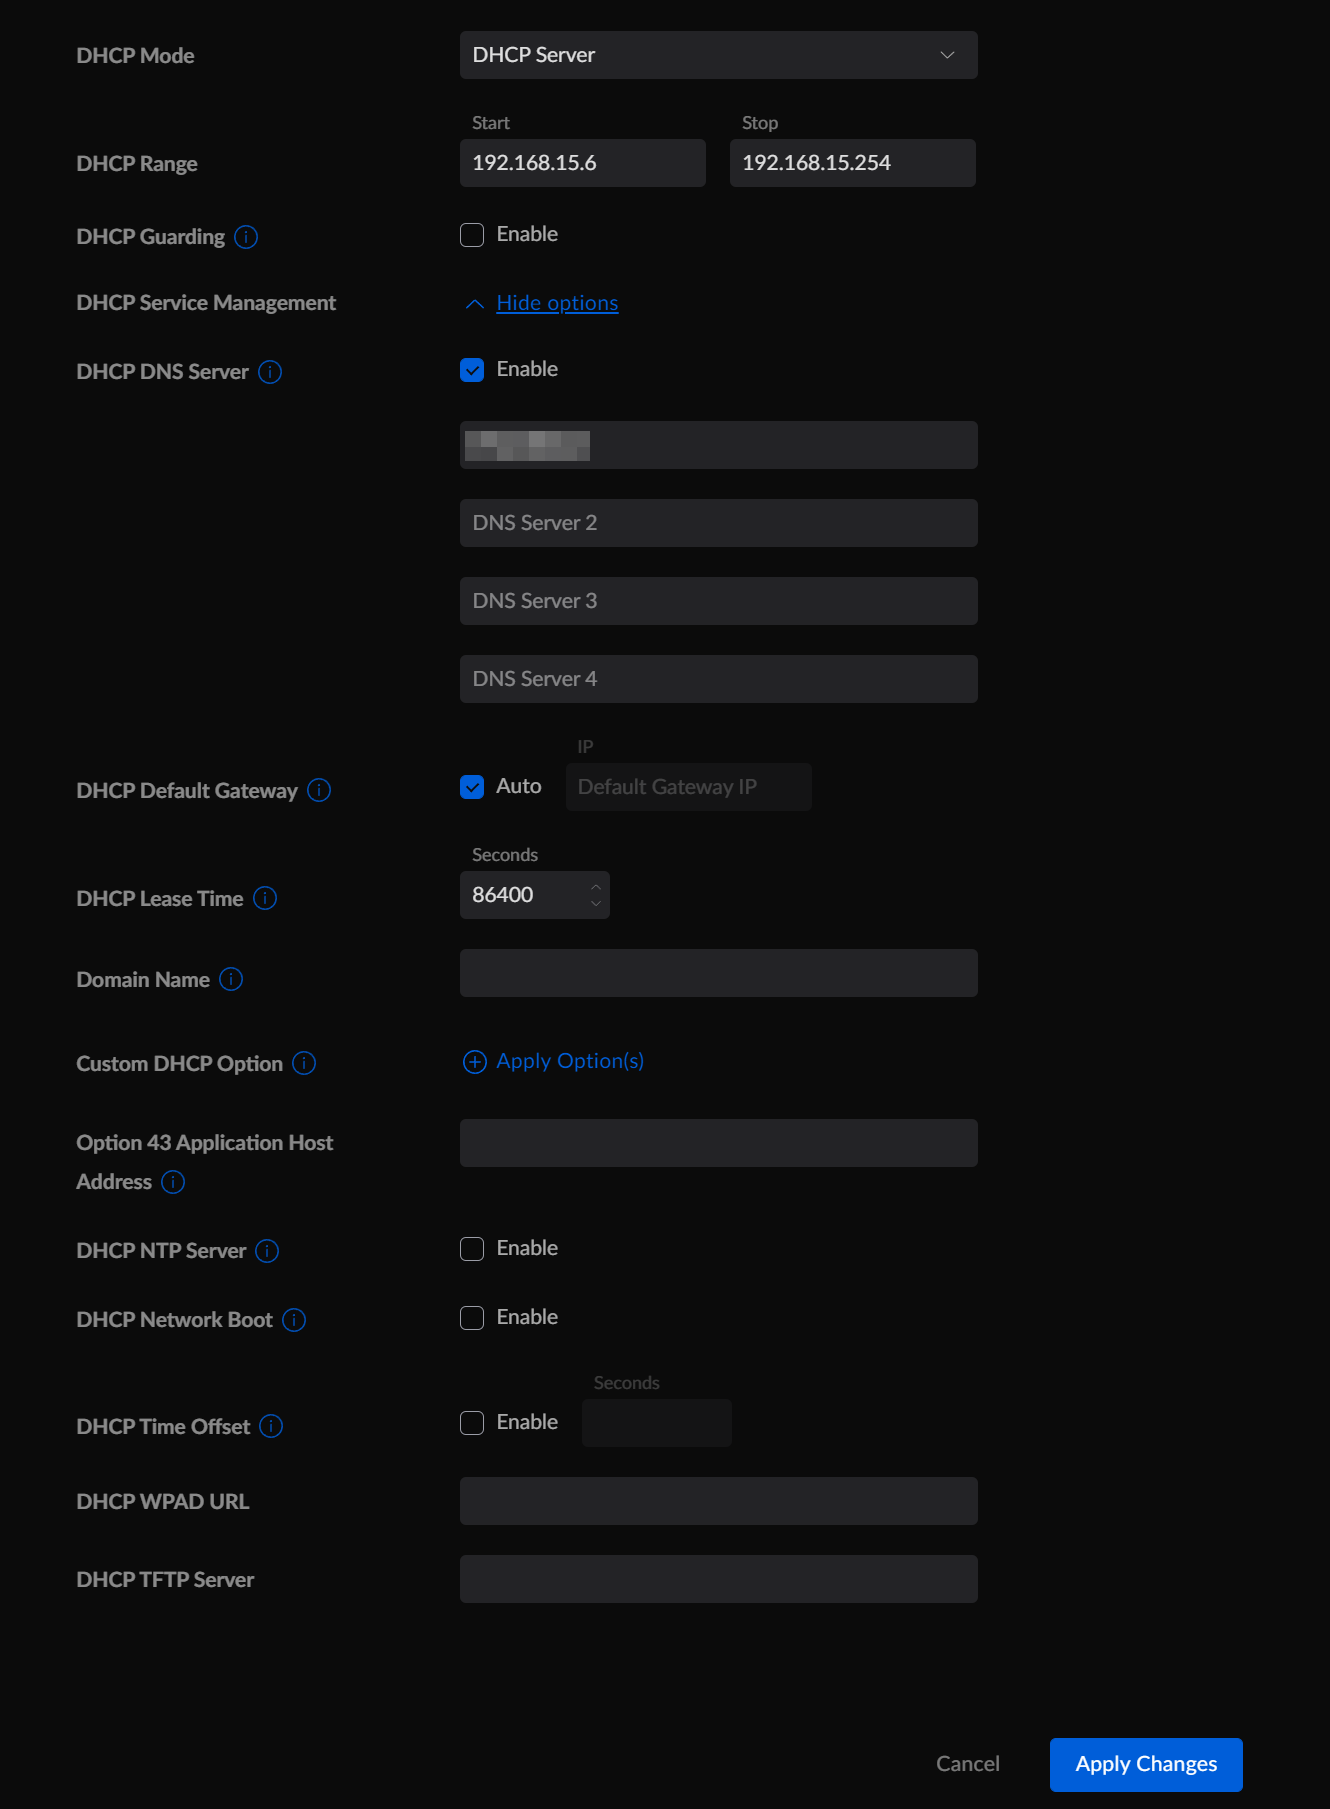
- DHCP Service Management - click on the Show Options link
- DHCP DNS Server - click on the Enable checkbox and then enter appropriate DNS entries
- Adjust other fields as you need (for the most part they can be left at their defaults)
- Click on the Add Network button to create the new network
Step 3- WiFi
The next step is to create a new WiFi access point (assuming that you will be using a wifi hotspot for your work related devices). Head back to the settings, and then select WiFi:
Then click on the Create New Wifi Network link:

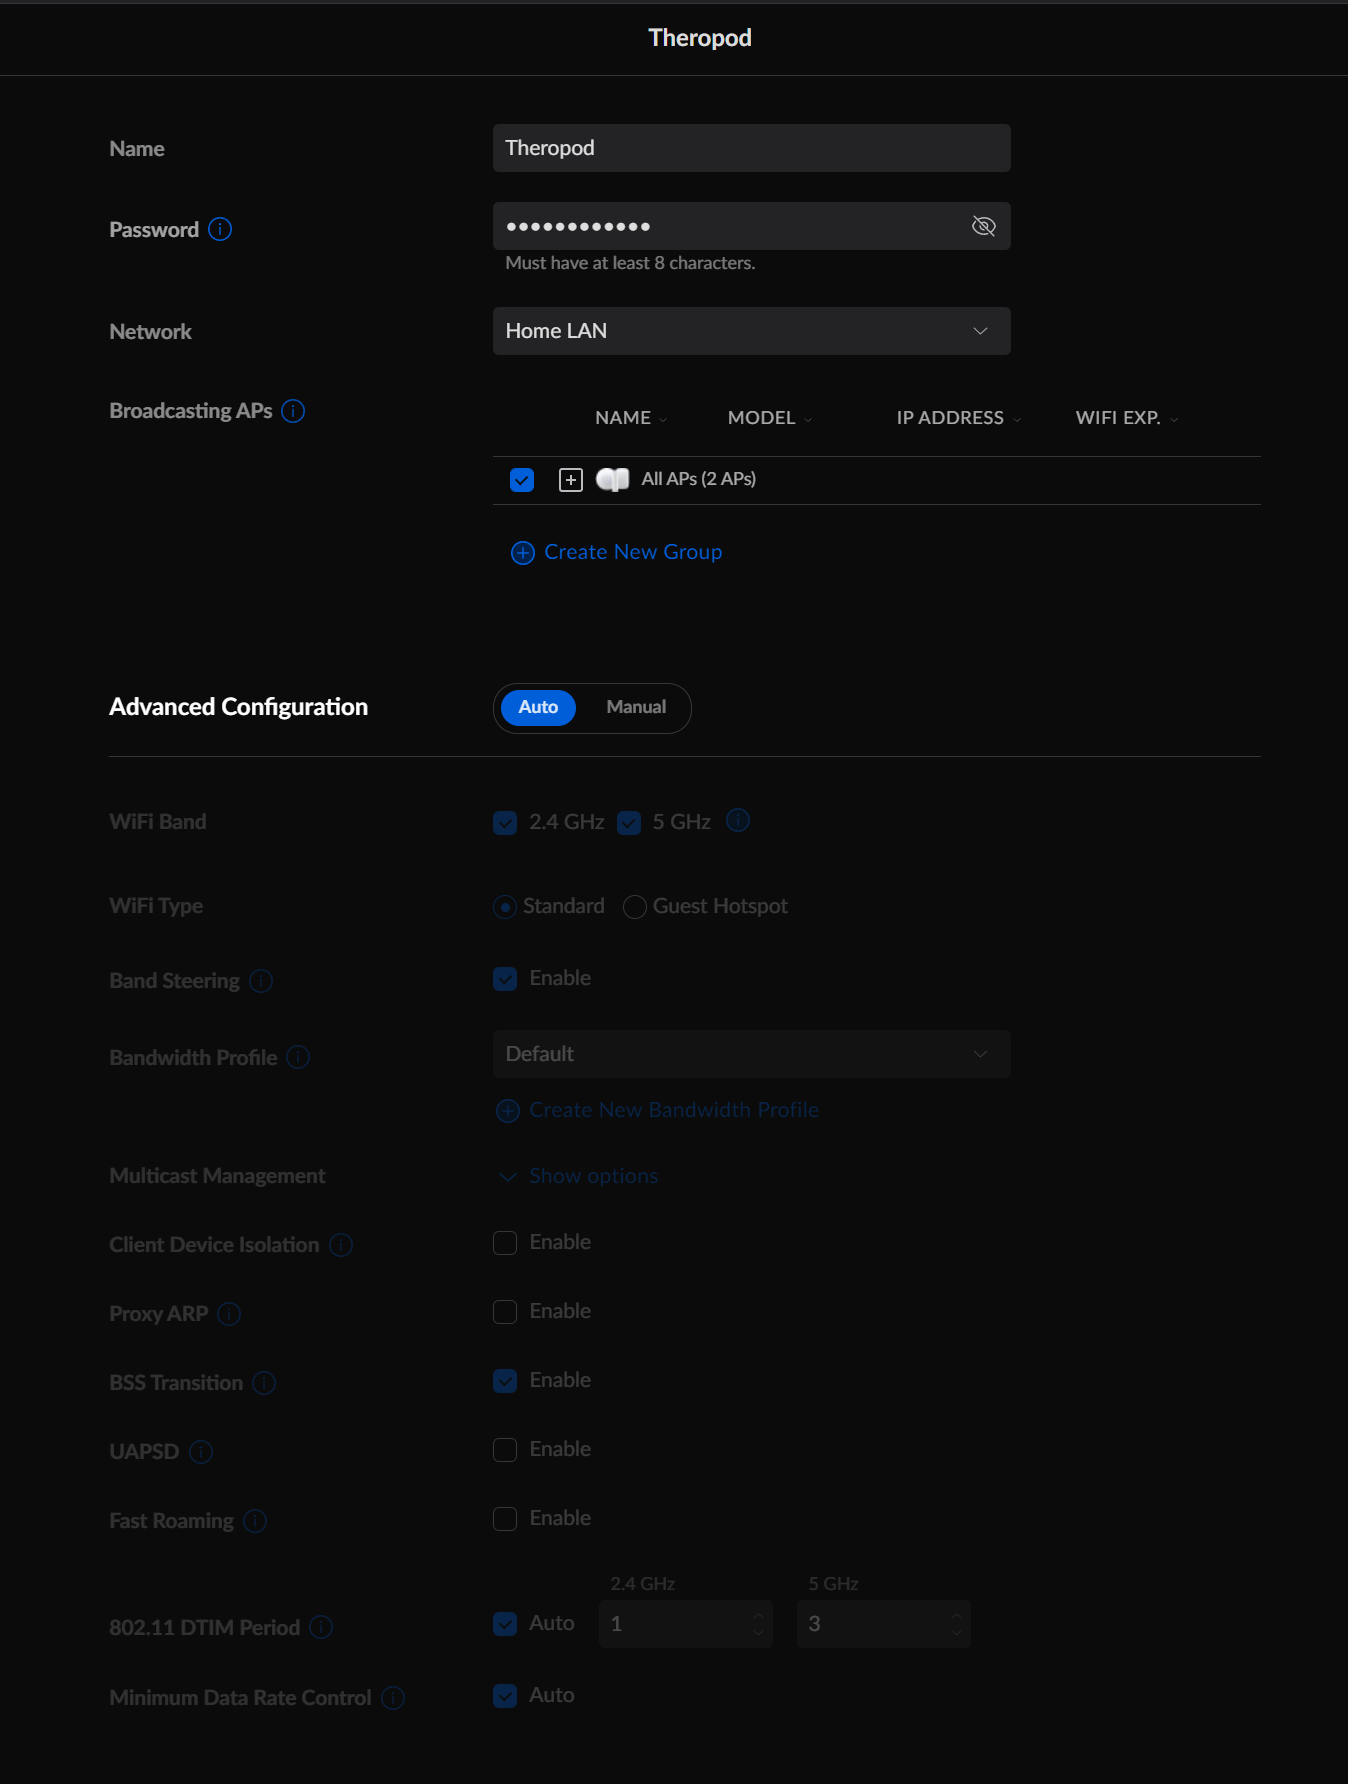
Next enter or select the following fields:
- Name - enter the name for the WiFi, this will become the SSID for the WiFi (if you are anything like me and are hopeless with names, there are a few sites that can help)
- Password - enter an appropriate password, I recommend at least 12 characters
- Network - select the network that you created from Step 2
- Click on the Add WiFi Network button to create the new WiFi network
You can try modify the other settings as well, but I would recommend just keeping them at their defaults.
Step 4 - Firewall
The next step is the firewall, this is important otherwise you won't get the network segmentation!
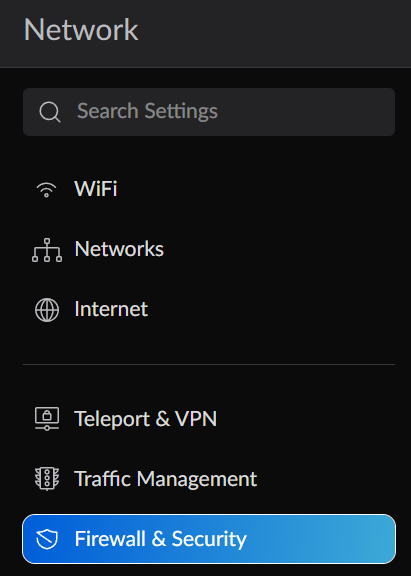
Head back to the settings, and then select Firewall & Security:
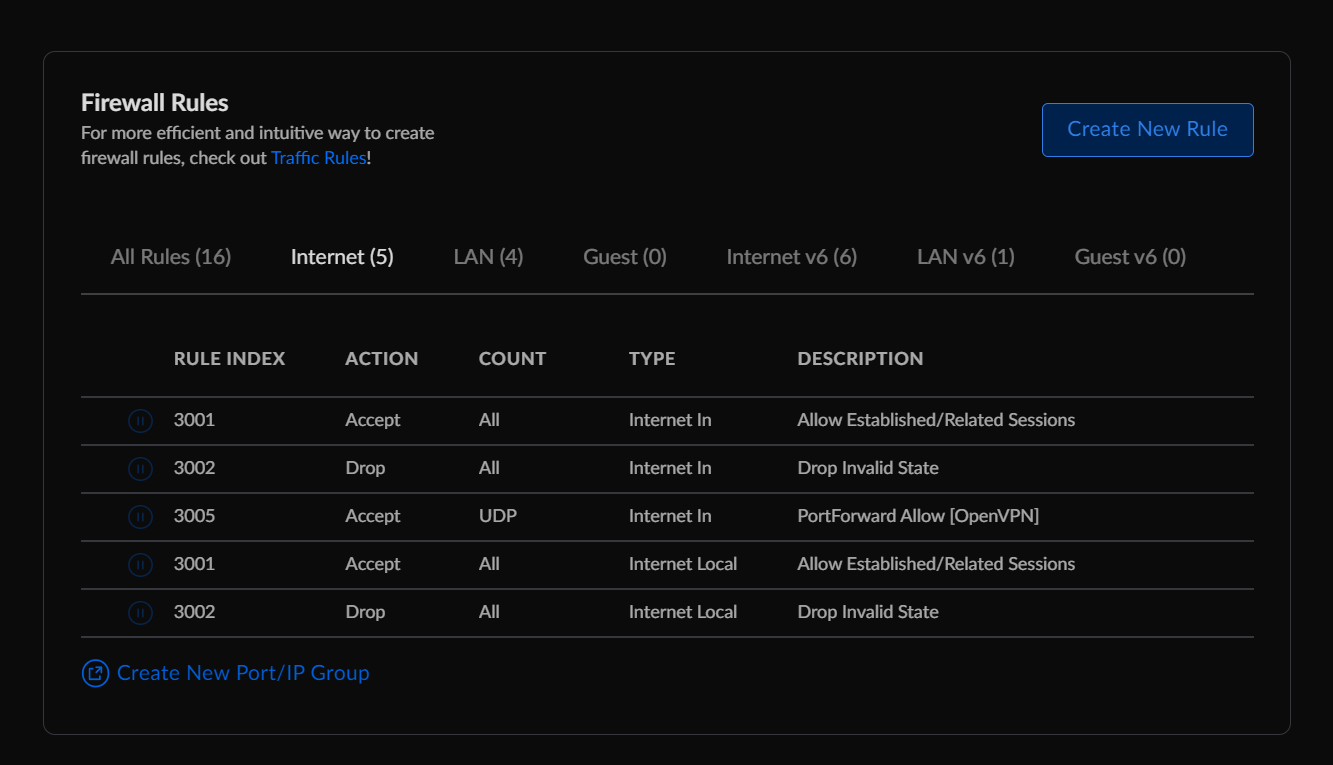
In the Firewall Rules block, click on the Create New Rule button:
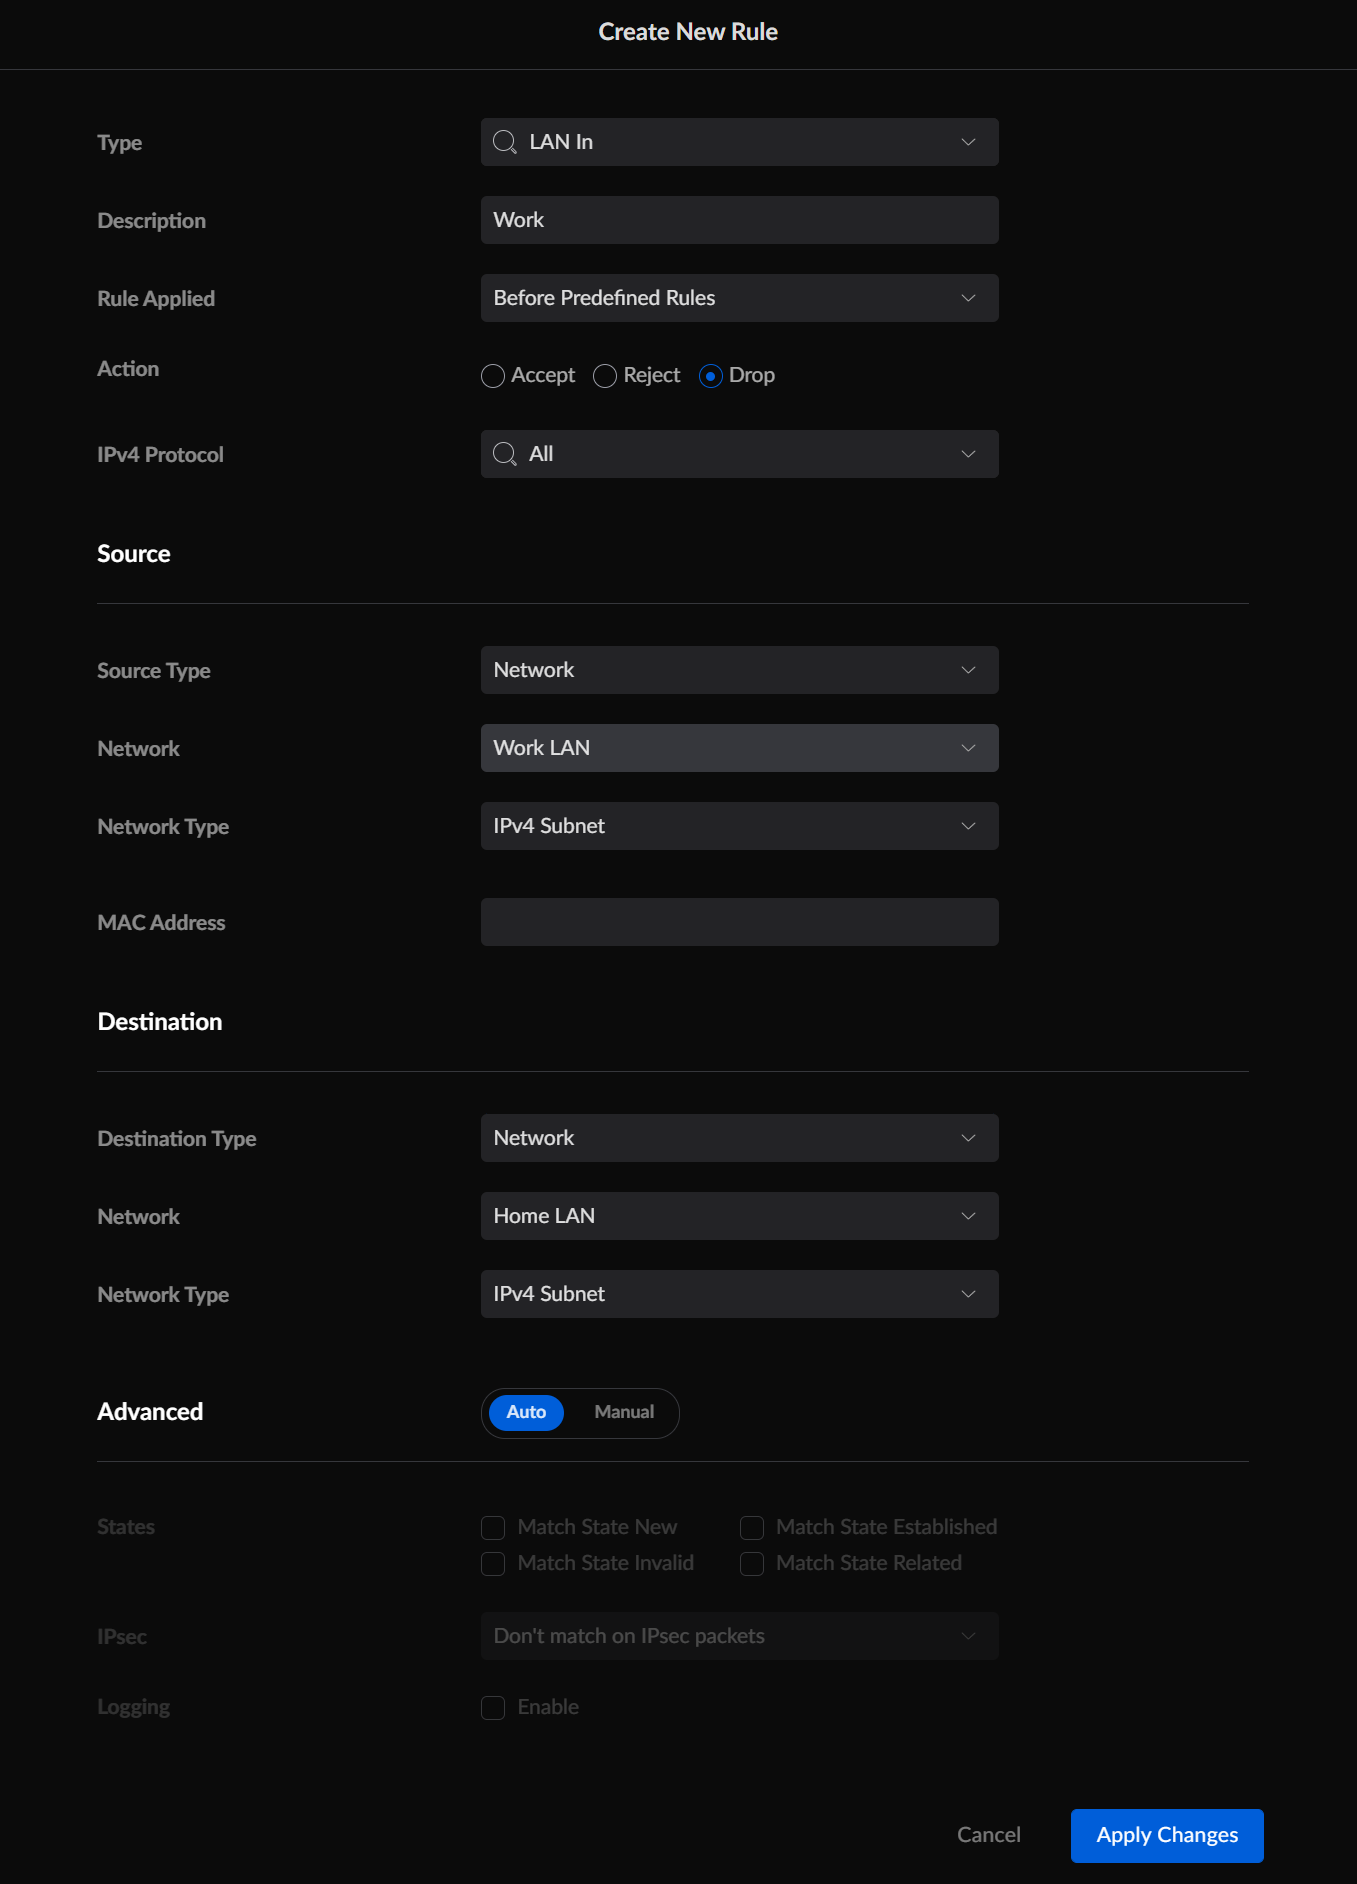
Next is to fill in the following details:
- Type - select LAN In
- Description - enter an appropriate description
- Rule Applied - select/leave at Before Predefined Rules
- Action - select Drop
- IPv4 Protocol - select/leave at All
- Source Type - select Network
- Network - select the new network that you created from step 2
- Destination Type - select Network
- Network - select your existing network (that existed before creating the new network from step 2)
- Click on the Apply Changes button to create the new firewall rule
Leave all the other fields at their defaults:
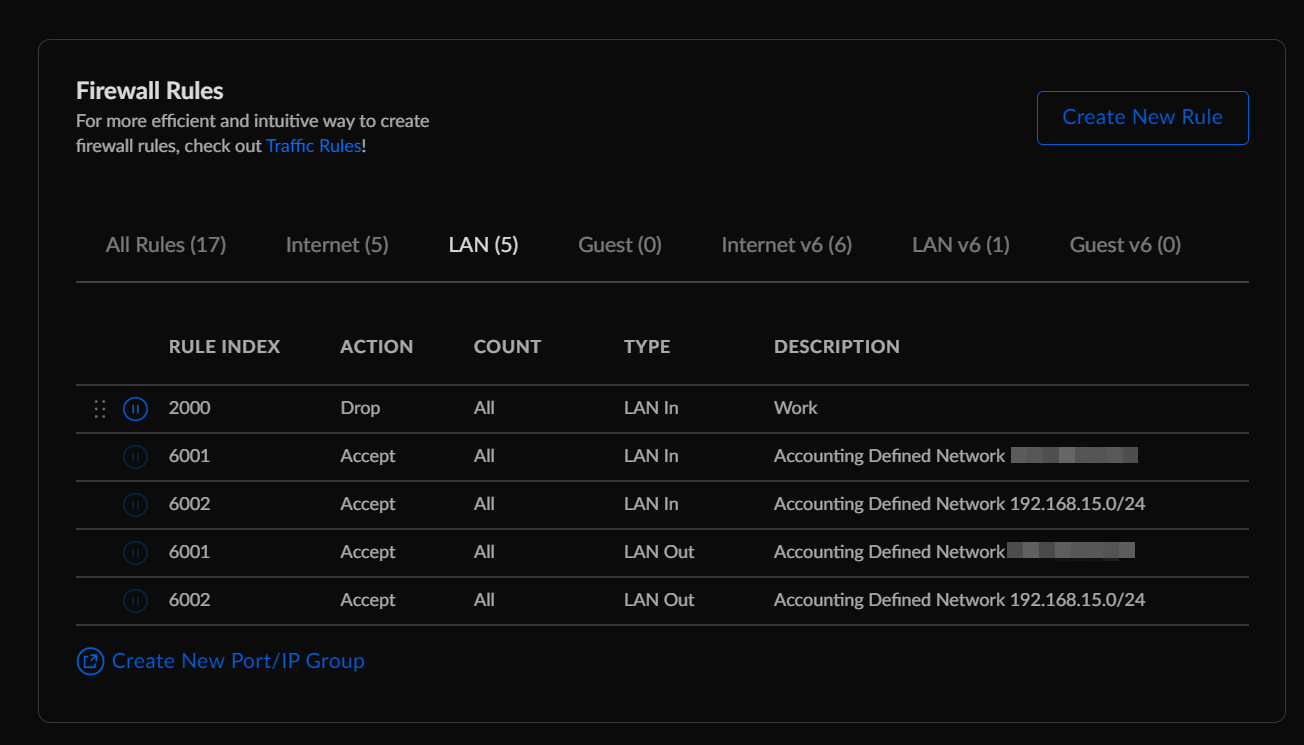
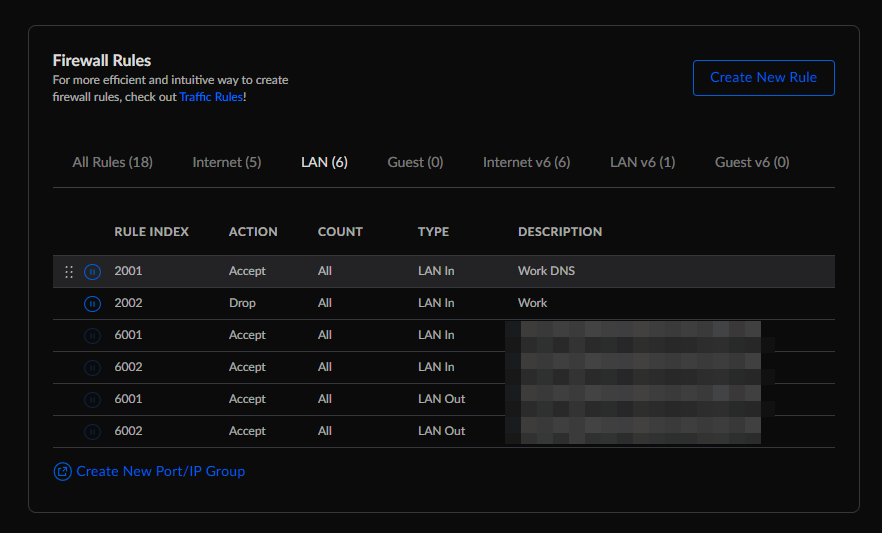
You can view your new entry in the Firewall Rules block on the Firewall & Security page. Select the LAN tab to filter the LAN rules (or select the All tab to see all your firewall rules):
Step 5 - Switches
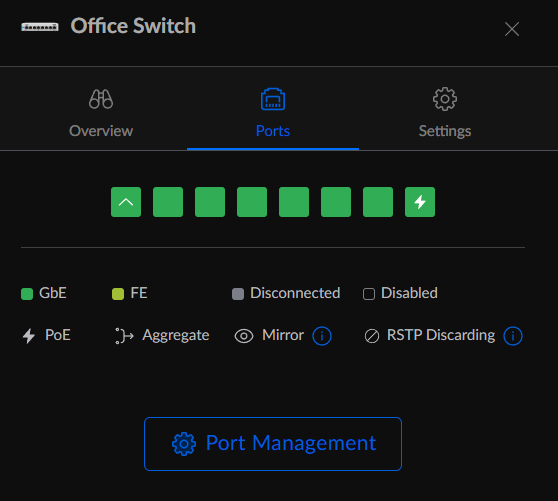
If you have any devices connected to switches you will need configure the ports on your switch to use your new network. To do this go to the UniFi Devices section:
Select the switch that you wish to edit, then select the Ports tab and click on the Port Management button:
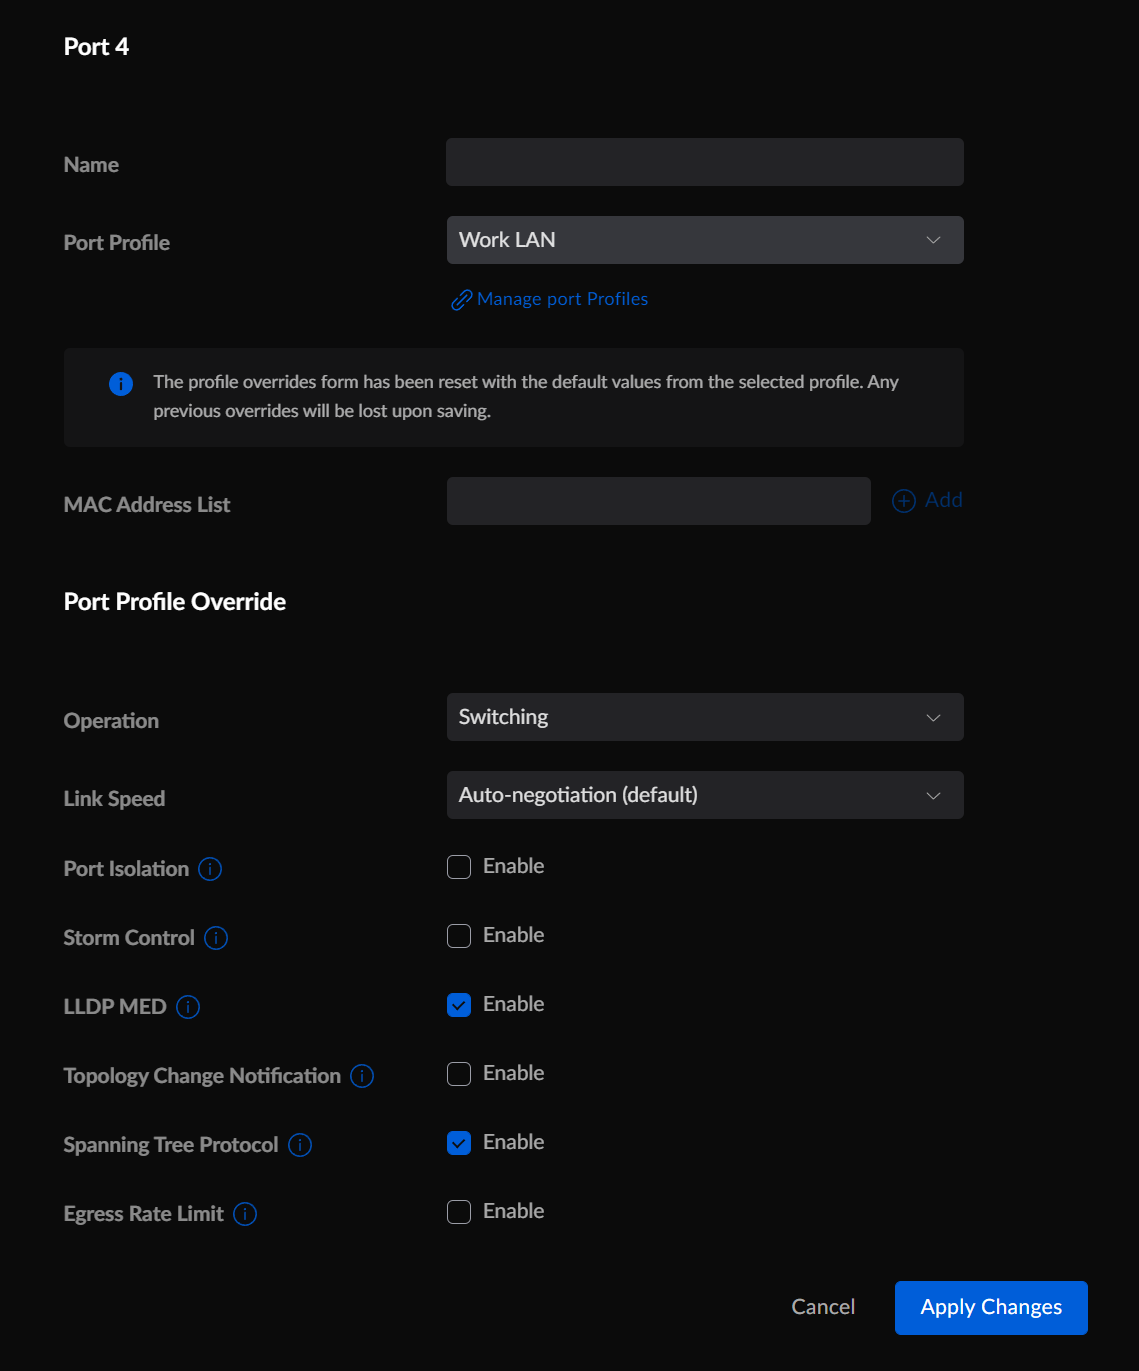
Select the port(s) which your device(s) is connected to and modify the following fields:
- Name - this is optional, but you can give it an appropriate name
- Port Profile - select the new network that you created from step 2 (this is under the Networks group in the dropdown list)
- Click on the Apply Changes button to save your changes.
Step 6 (Optional) - Allow Individual Access
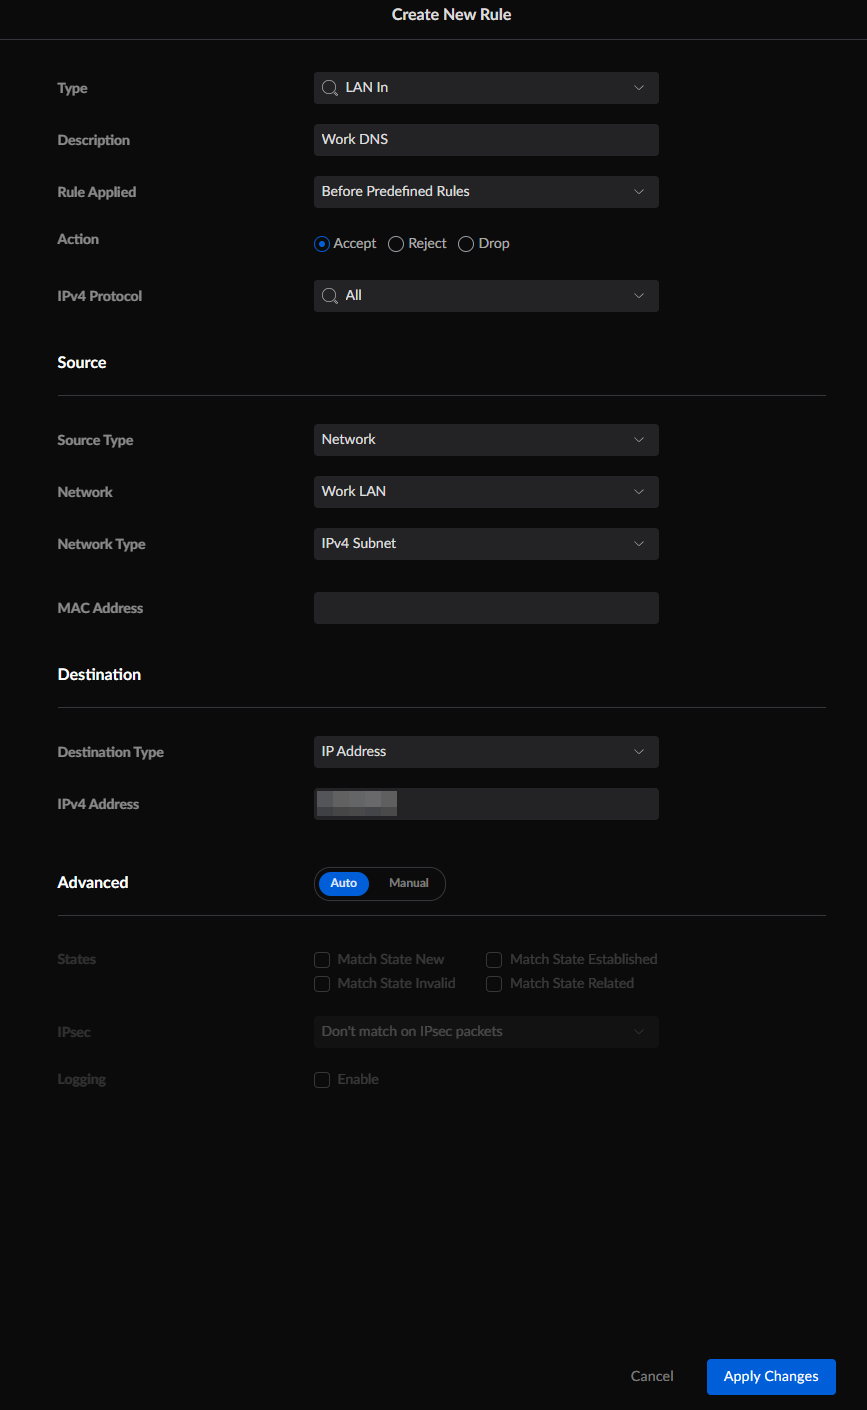
If you would like to allow access to individual systems (for example an internal DNS server that you have such as a Pi-Hole) between the network, you will need to create a new firewall rule. Head back to the Firewall & Security settings page.
In the Firewall Rules block, click on the Create New Rule button and complete the new rule with the following details:
- Type - select LAN In
- Description - enter an appropriate description
- Rule Applied - select/leave at Before Predefined Rules
- Action - select Accept
- IPv4 Protocol - select/leave at All
- Source Type - select Network
- Network - select the new network that you created from step 2
- Destination Type - select IP Address
- IPv4 Address - enter the IP address that you would like to allow access to
- Click on the Apply Changes button to create the new firewall rule
- In the Firewall Rules block on the Firewall & Security page, select the LAN tab to filter the LAN rules

- Click and drag (on the left hand side, to the left of the pause icon) the new rule to be set before the rule that you created in step 4
Step 7 - Backup
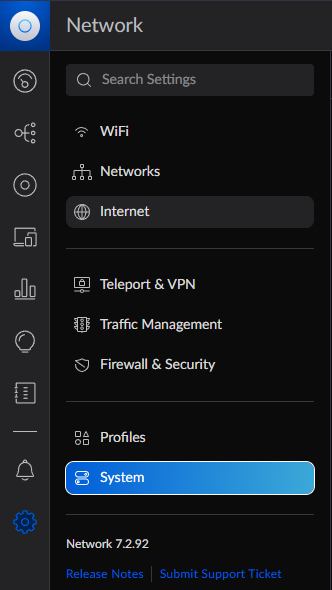
The last step is to backup your settings! I learnt this the hard way (I had an issue with my UDM and I had to reset it so I lost all of my settings). To perform a backup, go the Settings section and then select System:
Scroll down to the Backup section, and click on the Download link:
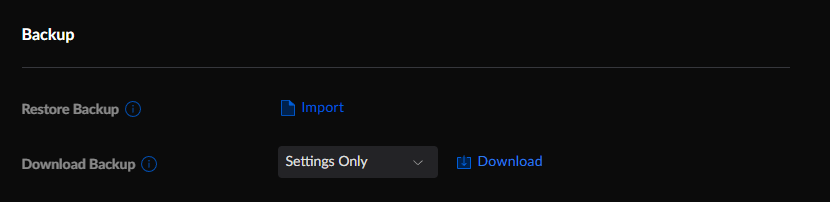
Once the backup has been created it will prompt you to save the file. Save the file somewhere that you will be able to access it later. Also given this file is used to restore settings (and thus will likely have things such as WiFi passwords), I highly recommend that you only save the file to a safe and secure location with limited access.
Hardware
These instructions should work for any Unifi enabled devices. For my setup I have the following:

