
A while ago I wrote a blog covering instructions on how to enable Let's Encrypt on Unifi. This worked well until version 3.x came along! Those instructions no longer work. The good news is that it's now even simpler!
Enable SSH
The first step is to enable SSH on your Unifi equipment. If you are using a Dream Machine, you can do this via the admin interface:
- Log into your Unifi OS admin console.
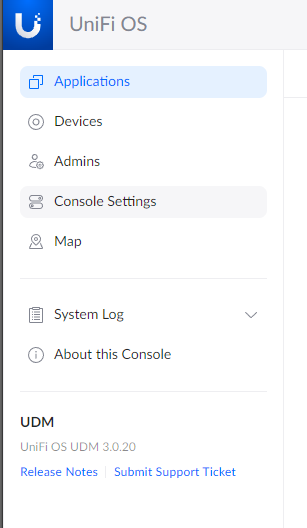
- Select Console Settings:
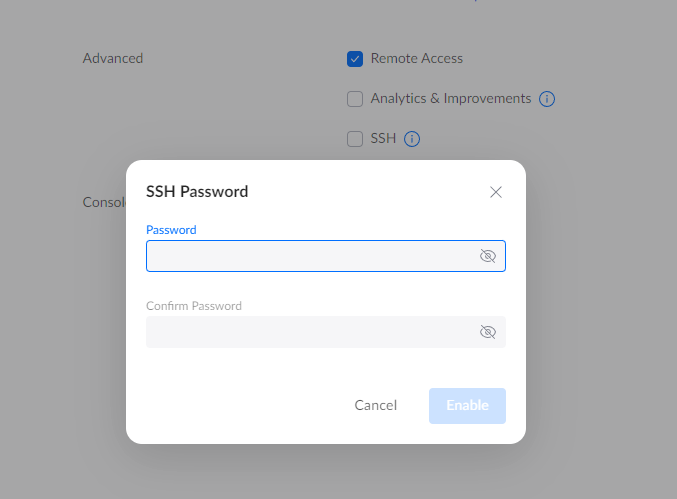
- Check the checkbox SSH and set an appropriate (unique and long!) root password:
Install certbot
The next step is to install certbot:
- SSH into your Unifi device as root using the root password that you set above.
- Next is to search for your DNS provider plugin for certbot:
apt search certbot-dns
- Take note of the package that you will need to install from the output. For example, if you are using Cloudflare you will need to install the
python3-certbot-dns-cloudflarepackage. - Install the certbot and appropriate certbot dns plugin:
apt install certbot <certbot-dns-plugin from step 4>
For example, for Cloudflare:
apt install certbot python3-certbot-dns-cloudflare
Cloudflare DNS
Since I use Cloudflare I will share the Cloudflare DNS plugin steps. If you use another provider, look to their documentation on how to do this.
- Log into your Cloudflare account.
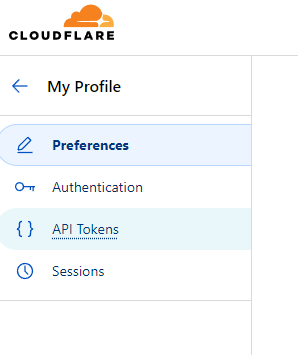
- Go to the My Profile page (done by selecting the top right of the page).
- Go to the API Tokens section:
- Click on the Create Token button.
- Select the Edit zone DNS template:

- Leave the Permissions section as is.
- In the Zone Resources section select the domain for which you wish to create the certificate under:

- Leave the other fields as is.
- Click on the Continue to summary button.
- Click on the Create token button to create the API token.
- Note the token down in a secure location.
- On your SSH session, create a file /root/cloudflare.ini with the following contents:
# Cloudflare API token used by Certbot
dns_cloudflare_api_token = <insert-your-API-token-here>
Obtain and Install the Certificate
The next step is to obtain a Let's Encrypt certificate:
- In your SSH session on the Unifi device, run certbot to obtain a certificate:
certbot certonly <dns-plugin> <dns-plugin-options> -d <cert-domain>
You will need to read the documentation for your specific DNS provider to determine what options you need to supply. If you are using Cloudflare you can use the following:
certbot certonly --dns-cloudflare --dns-cloudflare-credentials /root/cloudflare.ini -d <cert-domain>
where <cert-domain> is the domain/hostname for which you want to create the certificate for.
- Follow the instructions from certbot (for example entering an appropriate email address, agreeing to the terms and conditions, etc.).
- Once the certificate has successfully been created you will need to point Unifi to use it:
rm /data/unifi-core/config/unifi-core.crt
rm /data/unifi-core/config/unifi-core.key
ln -s /etc/letsencrypt/live/<cert-domain>/fullchain.pem /data/unifi-core/config/unifi-core.crt
ln -s /etc/letsencrypt/live/<cert-domain>/privkey.pem /data/unifi-core/config/unifi-core.key
where <cert-domain> is the domain/hostname for which you want to create the certificate for.
- Reboot your device.
And that's it. If all is setup correctly, once your device as restarted you should see the new and valid Let's Encrypt certificate being served!

